Aunt Annie's Crafts logo

Aunt Annie's Crafts

Craft projects and more!

Gift Wrap Crafts

Add your special touch to a gift wrapping

Gift Wrap Crafts

Add your special touch to a gift wrapping
 
advertisement
Gift Wrap Crafts Friday Fun

Origami Flying Bird

Makes your gift take flight, or brightens your decor!
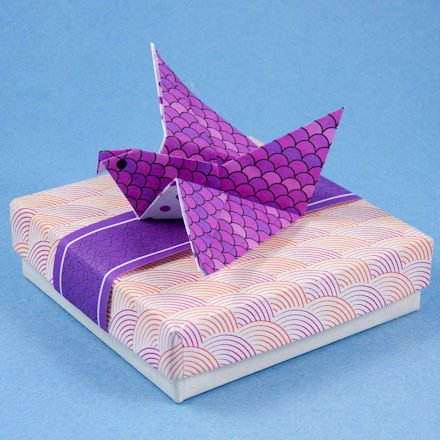
Origami flying bird on gift box
What you will make:

In this project, you'll see how to transform a square of paper with a few folds into a bird that can be used on a gift package in place of a bow. The flying bird has fewer folds than most origami birds, including the classic origami crane. This makes it an ideal origami craft project for beginning folders and children.

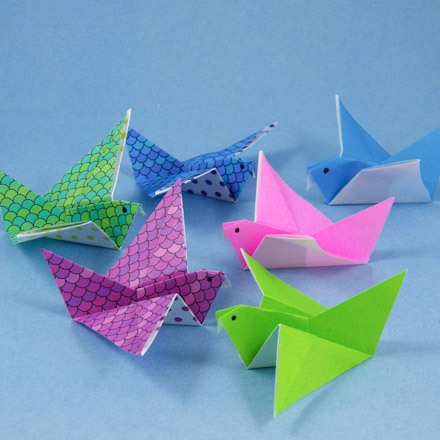
The birds can also be used to decorate a party table or dress up a flower arrangement. Make one bird or a whole flock of birds!

Related craft: See the Floral Wire Mobile craft project to see how to make a mobile with your origami flying birds!

Related craft: For another simple origami model, see the Jumping Origami Bunny craft project!

Here's what you need:
  • 4" (10 cm) square origami paper in several colors or lightweight paper to cut into squares
  • Optional: Black marker, scissors, ruler, pencil, craft knife and cutting mat

This project is rated EASY to do.

Share this craft with friends and family
Share on Facebook Share on Twitter Share with a pin on Pinterest Share using email
Before you start
  • Make a place to work.
  • Read all of the directions.
  • Gather everything you need to do the project.
  • Think about the project. Imagine how it will look and what you will do with it.
advertisement

How to Make Origami Flying Birds

Read all of the steps before starting.
Step 1: Project Preparation

Commercial 4" (10 cm) origami squares in bright colors are ideal for folding the flying birds; however, other lightweight paper works well, too. Simply cut 4" squares from any colorful paper you have on hand; just be sure it's no heavier than computer paper. It's important that the paper is cut in precise squares, but they can vary from 4".

Tip: You can create your own colorful paper by printing Aunt Annie's digital papers on one or both sides of white computer paper. The Animal Scales digital papers work particularly well.

Step 2: Fold

Carefully follow the folding instructions, using the illustration as a reference. The dashed lines indicate folds, while the red lines show creases already made. The red arrows are the direction of the folds, and the black curly arrow means to turn the folded paper over.

  1. Make a diagonal crease. Fold the square in half, corner-to-corner, then unfold.
  2. Fold the paper in half on the other diagonal. Leave folded.
  3. Fold the top layer back along the dashed line, so that the edge meets the fold. Flip the paper over.
  4. Fold in half on the dashed line to form a smaller triangle with a partial flap on top.
  5. Open the flap to form a point. Gently pull the point of the flap up while folding the entire top layer in half to form the new point. The points are the bird's head and tail—the new point is the head.
  6. Create the first wing by folding the top layer up to form a 90° angle between the head and the wing.
  7. Fold the bottom layer back in the same manner to form the other wing.
  8. Fold both wings down along the dashed lines to make the bird look as if it is flying!
  9. Push the front point on the head in and crease to form the bird's beak.

Tip: Add eyes to the bird with a black marker.

That's it! Make a whole flock of origami flying birds!
Origami flying birds

Keep up with Aunt Annie's Crafts on Facebook, Twitter, Tumblr, RSS feed or with our newsletter.

advertisement
 
Privacy Policy | About | Contact © 2023, AuntAnnie.com